

Making a cable plan takes no time at all. In just 3 simple steps. You can read how to do it here.
01. Cable plan
As with your lighting plan, the same goes for making a cable plan: start with a sketch. Whether it's your current garden or a garden you're laying new, making a sketch is the basis. A cable plan helps you plan the placement of cables before they are actually laid. This way, you avoid conflicts between cables and any other objects in the garden. This way, you guarantee optimal performance and - very importantly - the right safety.
Important points to include in your sketch:
Calculate the total power of your lighting plan
How many transformers do you need?
Moreover, it is easier to make changes before the cables go into the ground. This saves you time and effort. Very convenient!
02. step-by-step
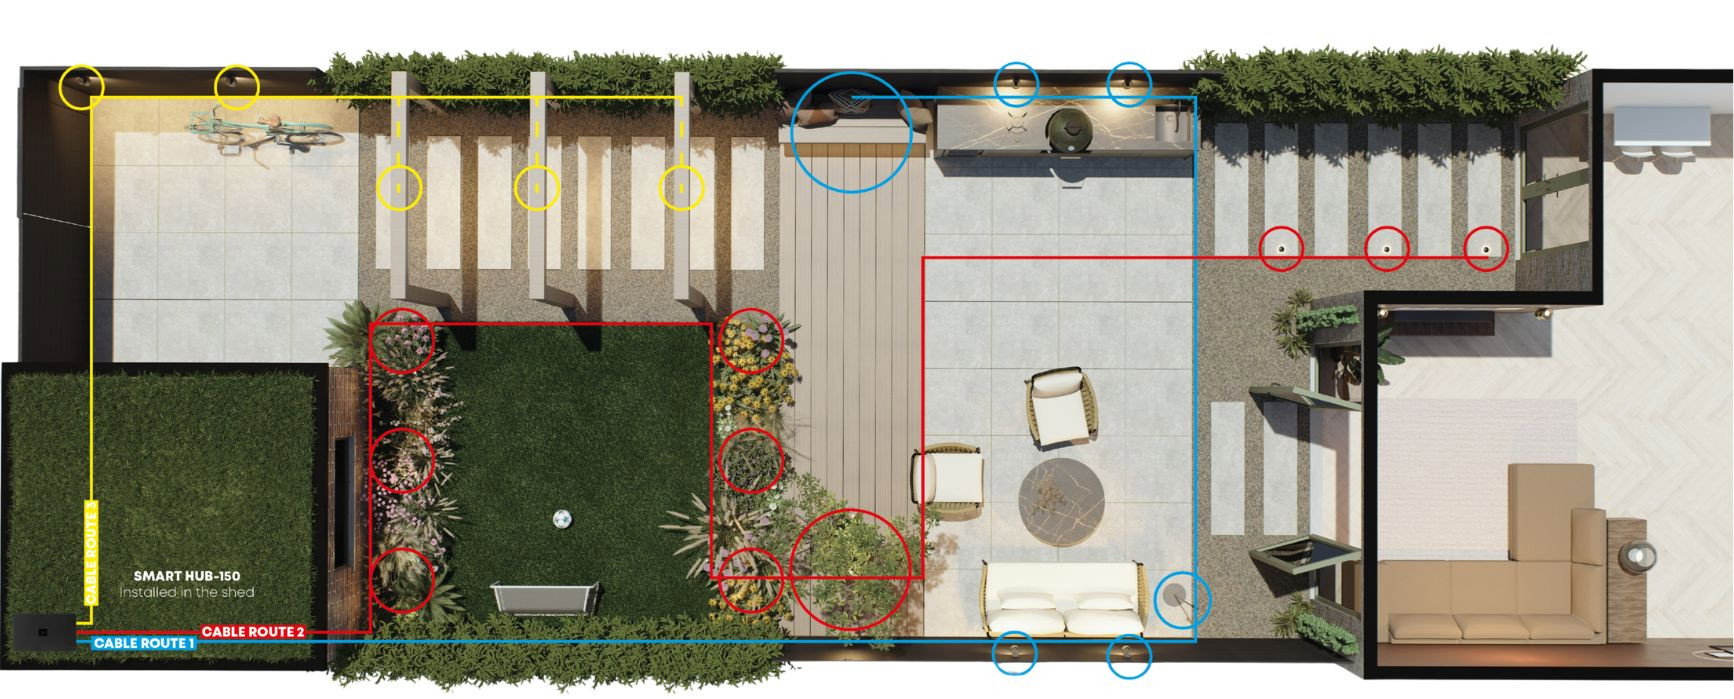
Once your overall sketch is ready, it's time to draw in the ground cables. The starting point: the transformer. By the way, we recommend hanging the transformer indoors, for example in the shed. From the transformer, you draw the cable(s) so that they lead past all the fixtures. Where it ends does not matter. You easily - and safely - hide the cable under a layer of earth.
It is important to note the length of the cable. From transformer to the end of the cable. That way you know exactly how much cable you need.


cable outlets
Depending on the number of VAs and the amount of garden lighting you want to install, choose a HUB (transformer). At in-lite, we have the HUB-75, SMART HUB-75, and SMART HUB-150. HUB-75 has two cable outputs. SMART HUB-75 also has two outputs, which can be controlled individually via the in-lite App. SMART HUB-150 has three outputs, all of which can be switched independently using the in-lite App.


branches
When drawing in the cables, you may find that a cable isn't long enough. In such cases, you can choose to add a cable branch. Try not to use too many, but if it can't be avoided, use the cable connector CC-2.


extension cables
As the name suggests, these cables are used to extend the distance between a fixture and the system cable, between the light sensor and transformer, etc. in-lite offers 1-metre, 2-metre and 3-metre cables, so you can make your decision based on the distance you require. This is great for wall fixtures that are difficult to reach with the main cable.
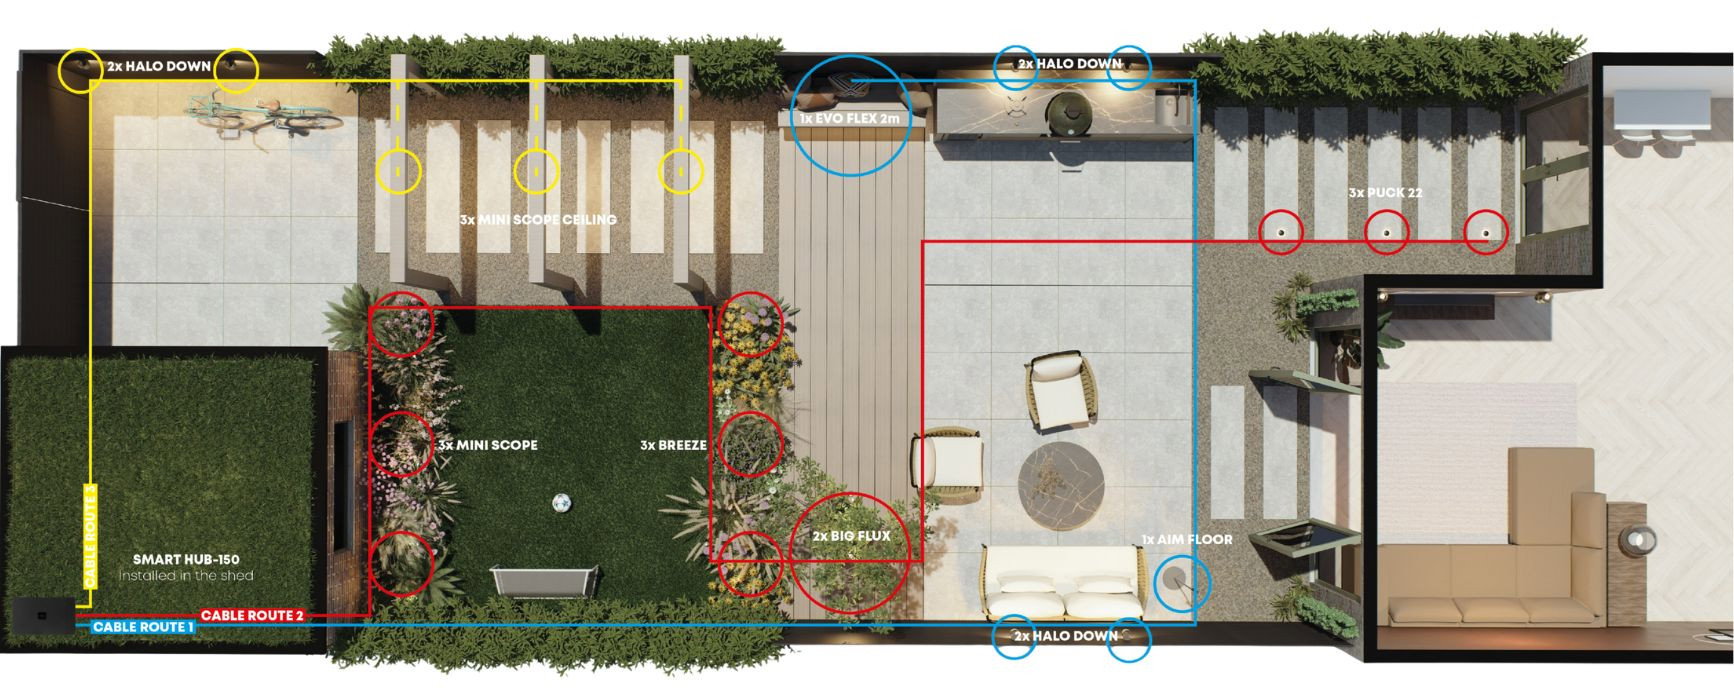
03. double check your VA value
Your cable plan is ready. And now? To be sure, check one last time that the transformers are not overloaded. Make sure you add up the VAs of all the fixtures you want to connect. And that this is always lower than the maximum load capacity of the transformer.
HUB75 > max 75VA
SMART HUB-75 > max 75VA
SMART HUB-150 > max 150VA
In addition, try to distribute the powers as much as possible across the cable outputs.
FIXTURE | NUMBER | VA / PIECE | TOTAL VA |
|---|---|---|---|
AIM FLOOR | 1 | 2,1 VA | 2,1 VA |
BIG FLUX (add ring) | 2 | 4,2 VA | 8,4 VA |
EVO FLEX 2 (add DRIVER) | 1 | 15,7 VA | 15,7 VA |
BREEZE | 3 | 1,7 VA | 5,1 VA |
HALO DOWN | 6 | 5 VA | 30 VA |
MINI SCOPE | 3 | 2 VA | 6 VA |
MINI SCOPE CEILING | 3 | 2 VA | 6 VA |
PUCK 22 Black | 3 | 0,6 VA | 1,8 VA |
TOTAAL | 75,1 VA |
Outsource cable plan
After reading these steps, do you think: I'd rather outsource it anyway? No problem. At in-lite, we have professionals who can provide you with excellent assistance. They will create both a cable and lighting plan for your garden.
Making a lighting design?
Before drawing up a cable plan, it is important to know where the garden lighting is going to be. You record this in a lighting plan. How to make one? Read the article: 'In 4 Steps to a Lighting Plan'. After all, your lighting plan is the basis of your cable plan and necessary before you go any further. If you still have questions after reading the article, or prefer to outsource? You can! Request a lighting plan and we will come and help you.